Labels
- AIL (7)
- Angels Designz (6)
- Blog Layouts (8)
- Broken Dreamz (1)
- Broken Sky Dezine (2)
- Coyotie Designs Exclusives (2)
- Crazy Girl (2)
- E-Mag Previews (1)
- Forum Sets (2)
- PSP Party Central (1)
- PSP Party E-Mag (1)
- Purples Creations (7)
- Scrap Kits (3)
- Scrappin Krazy Designs (9)
- Scraps From The Heart (7)
- Wicked Princess (4)
My Badges
Powered by Blogger.
My Stalkers
02 March, 2011
Angel Blue

This tutorial was written by Coyotie on Feb 27, 2011. Any resemblance to any other tutorial is purely coincidental.
Supplies:
Tube of choice. I'm using the artwork of Elias Chatzoudis, please do not use his work unless you have the proper license to do so. You can purchase his work and obtain a license at PSP Tubes Emporium
Scrapkit of choice. I'm using a PTU kit called Love made by my very wonderful friend Kaci of Scrappin Krazy Designs. You can find this kit and many more awesome kits HERE
SKDS_Mask02 this can be found at Scrappin Krazy Designs above
This tutorial was written with the assumption that you have a basic working knowledge of PSP. I'm using PSP X but this can be done in any other version
Let's get started!
Open a 600x600 transparent canvas, flood fill white
Copy and paste a paper of choice, apply mask, merge group
Copy and paste pink hearts resize add drop shadow
Copy and paste clouds 1 & 2 move them both to the bottom of the hearts and overlap them a bit, add a really light drop shadow
Add your tube resize and place on top of the clouds and add a drop shadow
Copy and paste your bow resize move to the upper left and add drop shadow
Crop tag
Add artist info and license #
Add name
Done!!
Labels:
Scrappin Krazy Designs
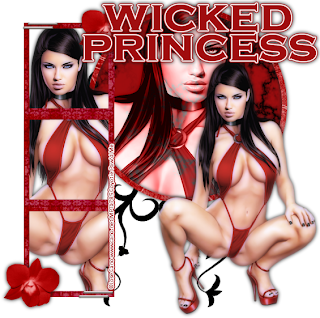
Witchy Woman

This tutorial was written by Coyotie on Feb 27, 2011. Any resemblance to any other tutorial is purely coincidental.
Supplies:
Tube of choice. I'm using the artwork of Jose Cano. Please do not use his work unless you have the proper license to do so, you can purchase his work and obtain a license at PSP Tubes Emporium HERE
Scrapkit of choice. I'm using a PTU kit called Wonderfully Wicked made by my very awesome friend Shani of Wicked Princess Scraps, you can find this kit and many more awesome kits from her HERE
Filters:
Xero - Porcelain - Default
Eyecandy 4000 - Marble - Settings below
This tutorial was written with the assumption that you have a basic working knowledge of PSP. I'm using PSP X but this can be done with any other version
Let's get started!
Open a 600x600 transparent canvas, flood fill white
Copy and paste triple frame - magic wand - hold down the shift key and click inside all 3 squares
Selections - Modify - Expand by 3
Add your tube and move over the triple frame
Selections - Invert - hit your delete key
Selections - Select None
Move below frame layer and add a drop shadow and apply porcelain effect
Copy and paste flower, resize move to bottom left corner of the frame, duplicate and move the copy to the upper right corner of the frame add a drop shadow to both
Copy and paste staple and repeat step above without the drop shadow
Copy and paste doodle free rotate 90 degrees to the right resize and duplicate and mirror, merge these 2 layers together and drag below your frame and tube layers and add a drop shadow
Using a paper of choice and set as your foreground layer to pattern and select your paper, background color set to hidden use your elipse tool, width set at 10, and draw out a decent sized circle - convert to a raster layer
Using your magic wand tool again click inside your circle
Selections - Modify - Expand by 3
Add new raster layer and flood fill with a color from your tube
Selections - Select None
Drag the fill below your circle layer
Repeat this step with the close-up of your tube add a drop shadow and change your blend mode to luminance (legacy)
On your filled color layer apply Eyecandy 4000 - Marble with these settings:
Vein size: 51.79
Vein Coverage: 76
Vein Thickness: 4
Vein Roughness: 79
Bedrock Color: Color of the circle
Vein Color: Black
Seamless Tile: checked
Random Seed: 460
Add your tube resize and move to the right add a drop shadow and apply porcelain again
Crop tag
Add artist info and license #
Add name
Done!!
Labels:
Wicked Princess
Bad Vampiress

This tutorial written by Coyotie on Feb 27, 2011. Any resemblance to any other tutorial is purely coincidental.
Supplies:
Tube of choice. I'm using the artwork of Jose Cano, please do not use his work unless you have the proper license to do so. You can purchase his work and obtain a license at PSP Tubes Emporium HERE
Scrapkit of choice. I'm using a PTU kit called Kinky Valentine made by my very good friend Tracey of Broken Dreamz Designs. You can find this kit and many more awesome kits from her HERE
Vix_Mask123 found HERE
This tutorial was written with the assumption that you have a basic working knowledge of PSP. I'm using PSP X but this can be done with any other version
Let's get started!
Open a 600x600 transparent canvas, flood fill white
Copy and paste paper of choice, apply mask, merge group
Copy and paste Mardi Gras mask, resize and move toward the top a bit add drop shadow
Copy and paste Parental Advisory sign and move under the Mardi Gras mask add drop shadow
Add your tube resize and move on top of the sign so she appears to be kneeling, squatting, sitting etc. on the sign add drop shadow
Copy and paste whip resize move to the bottom right corner of the sign and add a drop shadow
Crop tag
Add artist info and license #
Add name
Done!!
Labels:
Broken Dreamz
She's a Diva

This tutorial was written by Coyotie on Feb 27, 2011. Any resemblance to any other tutorial is purely coincidental.
Supplies:
Tube of choice. I'm using the artwork of Elias Chatzoudis, please do not use his work unless you have the proper license to do so. You can purchase his work and obtain a license from PSP Tubes Emporium HERE
Scrapkit of choice. I'm using a PTU kit called She's a Diva made by my very wonderful friend Kelly of Angel's Designz. You can find this kit and many more awesome kits HERE
Vix_Mask15 found HERE
This tutorial was written with the assumption that you have a basic working knowledge of PSP. I'm using PSP X but this can be done with any other version
Let's get started!
Open a 600x600 transparent canvas, flood fill white
Copy and paste your paper and apply Vix_Mask15, merge group
Effects - Textures - Blinds set at 3
change layer opacity to 71
Copy and paste word art, add a light colored drop shadow, and change your layer blend mode to dissolve
Copy and paste your heart, resize and move to the left and add a drop shadow
Copy and paste doodle, move to the left duplicate mirror and drag below your mask layer, add a drop shadow
Add your tube, resize slightly add a drop shadow
Copy and paste ribbon drag just above the mask layer add a drop shadow
Copy and paste butterfly resize move to upper right - blend mode burn and drag below ribbon layer
Copy and paste bow resize move to upper left drag below tube layer and add a heavy drop shadow
Copy and paste bottle cap resize and move to lower right add drop shadow
Crop tag
Add artist info and license #
Add name
Done!
Labels:
Angels Designz
Butterfly Kisses

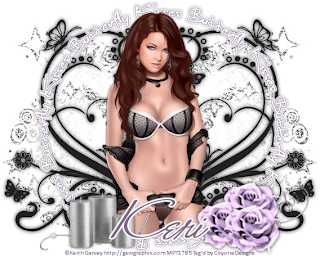
This tutorial was written by Coyotie on Feb 27, 2011. Any resemblance to any other tutorial is purely coincidental.
Supplies:
Tube of choice. I'm using the artwork of Keith Garvey, please do not use his work unless you have the proper license to do so. You can purchase his work and obtain a license at PSP Tube Emporium HERE
Scrapkit of choice. I'm using a PTU kit called Lilly Lilac made by my very wonderful friend Keri of Purple's Kits. You can find this kit and many more awesome kits from Keri HERE
Butterfly Kisses word art made by me, you can download it HERE
Vix_Mask126 which can be found HERE
This tutorial was written with the assumption that you have a basic working knowledge of PSP. I'm using PSP X but this can be done with any other version.
Let's get started!
Open a 600x600 transparent canvas, flood fill white
Copy and paste your paper and apply Vix_Mask126, merge group
Copy and paste your doodle, move to the left of the canvas, duplicate and mirror, add a heavy drop shadow
Add your tube of choice, resize and add a drop shadow
Copy and paste your word art
Copy and paste flower, resize and move to the lower right side of the word art, duplicate twice and move the copies around so you make a small flower cluster, merge just the layers and add a heavy drop shadow
Copy and paste your candle, resize and move to the lower left side of the word art and add a heavy drop shadow
Copy and paste the "love" wire, resize and add a light drop shadow and move to the lower center and drag below the candle and flower cluster layers
Crop tag
Add artist info and license #
Add name
Done!!
Labels:
Purples Creations
Subscribe to:
Posts (Atom)
About Me

- Kellie G.
- I'm Kellie and I'm just a simple girl who loves to read and travel. Mom of 5 and Independent Distributor for It Works! Global.


